Thursday, November 8, 2012

HOW TO MAKE A BOW


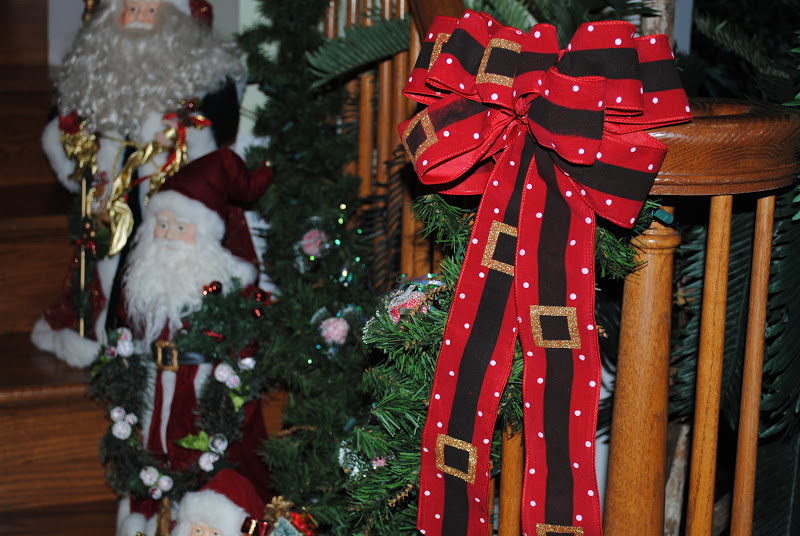
Bows add fun and festivity to everything.  You can attach them to wreaths, garland, chair backs, sconces as well as endless other possibilities.  They are easy and inexpensive to makeThe instructions below look long and laborious but there really are just a few steps that are repeated over and over again to create a beautiful full bow!

                                                               MATERIALS

                                                            *5 yards Ribbon
                                                                Floral Wire 
                                                                   Scissors
                                                             Tape Measure


*Fabric and craft stores sell a large variety of ribbon.  Costco sells a nice selection at Christmas as well.  If you like convenience, Amazon also has a great selection.  Please click below if you would like to see what they offer...

Christmas Ribbon

                                                             INSTRUCTIONS

STEP 1:   Roll one end of the ribbon around your thumb.  The roll will be about 1 1/2" round.  You will continue to hold the roll securely in place with your thumb as you make your bow.  This roll will be the center of your bow... 


Position ribbon to look like photo below.  This will be the front of the bow...


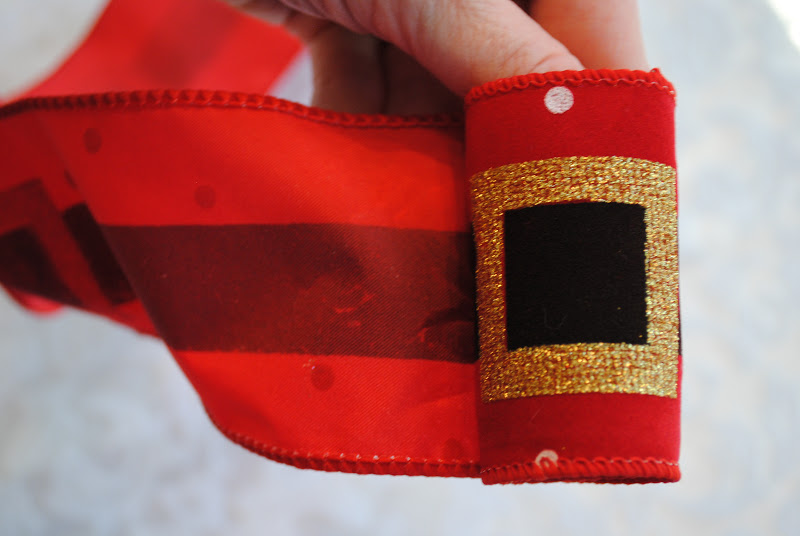
Photo below is the back of the bow...


STEP 2:  With the front of the bow facing you, twist ribbon in back of the center roll...


The back of the bow will now look like photo below...


The front of the bow will now look like this...


Loop ribbon (2 1/4") to the left side of the center roll which you are holding securely with your thumb so that it looks like photo below...


With the front of the bow facing you twist ribbon in back of the bow...


The back of the bow will now look like this... 


The front of the bow will now look like this...


Loop ribbon (2 1/4") on right side of the center roll you are still holding securely with your thumb so that it looks like photo below...


STEP 3:  With the front of the bow facing you, twist ribbon in back of the center roll...


The back of the bow will now look like photo below...


The front of the bow will now look like this...


Loop ribbon (1 1/4" longer than first loop) to the left side of the center roll which you are holding securely with your thumb so that it looks like photo below...


With the front of the bow facing you twist ribbon in back of the center roll...


The back of the bow will now look like photo below...


 The front of the bow will now look like this...


Loop ribbon (1 1/4" longer than first loop) on right side of the center roll you are still holding securely with your thumb so that it looks like photo below...


You have now made two loops on each side of the center roll.  A large full bow requires five loops on each side.  Repeat the steps above until you have made five on each side.


Once you have made five loops on each side bring excess ribbon straight down vertically from behind center roll.  Cut vertical ribbon to desired length...


Cut a second piece of ribbon about the same length as the vertical ribbon in the photo above and set aside for now...


STEP 4:  Cut and thread floral wire (12-18" depending on width of ribbon) through the center roll...


Pull the floral wire to the back of the bow and twist tightly behind the center roll so that the loops of ribbon are pulled tautly together to secure them in place...


STEP 5:  Taking the second piece of ribbon you cut to hang vertically, place it behind the center roll on top of existing twisted wire and secure the second ribbon in place tightly to secure... 


Front of the bow will now look like photo below...


STEP 6:   To fluff out the bow loops - start on left side of the center roll - With you left hand grab the first loop nearest the center roll and with your right hand grab the second loop.  With your left hand pull the first loop upward and with your right hand pull the second loop downward simultaneously... 


Do the same with the third and fourth loops.  With your left hand grab the third loop and with your right hand grab the fourth loop.  With your left hand pull the third loop upward and with your right hand pull the fourth loop downward simultaneously...  


Then holding the four loops in place with your left hand take the fifth loop with your right hand and pull downward..


Repeat the same process on right side of the bow...


                                          YAY!!!  You have completed your bow!!! 


                                                                ~ Debbie ~
                                                                 
Want more decorating ideas?  Please click below...
Pineapples & Palm Trees

Friday, October 12, 2012

PREPARING THE MANGER WITH GOOD DEEDS


This is a sweet tradition I started with my children when they were very young.  We made a manger out of popsicle sticks (very economical and easy).  Starting at the beginning of  December every time one of them would do a good deed (act of kindness, chore, thoughtfulness) I would recognize it by asking them to place a piece of straw in the manger in order to prepare it for Baby Jesus. The goal was to have the manger filled with straw by Christmas Day.  Come Christmas morning, they would then place Jesus in the manger resting symbolically on all their good deeds. 

                                                               MATERIALS


                                                          Popsicle Sticks (12)
                                                  * Non-toxic Glue or Glue Gun
                                                  ** Hay (Sandwich baggie full)
                                                  *** Miniature plastic baby doll
                                            Fabric (little piece to wrap baby doll in)

* This is a fun project to make with children when using non-toxic glue.  I have burned myself enough times that I would NOT recommend a child use a glue gun even with adult supervision.

** I don't buy hay.  I go to a Pumpkin Stand in the fall and ask if I can have a handful of hay that has gotten loose and scattered on the ground.

*** The baby doll pictured is part of a nativity I already have.  But, I have also bought miniature plastic baby dolls at party stores in the Baby Shower aisle.    

DIRECTIONS FOR MANGER:

STEP 1:  Glue (non-toxic glue dries invisible whereas glue gun looks slightly messy in between the sticks) 4 popsicle sticks together lengthwise.  Then glue a second set of 4 popsicle sticks together lengthwise.


STEP 2:  Glue 2 popsicle sticks together in the shape of an "X:.  Then glue a second set of 2 popsicle sticks together in the shape of an "X".


STEP 3:  Stand one of  the "X" shaped popsicle sticks up and glue one side of the top of the "X" on the inside as pictured. (Glue gun sets faster than non-toxic glue and with non-toxic glue you have to find a way to keep the sticks propped up until it sets.  I have made them both ways and Step 3 is the only step where a glue gun is much more convenient as long as you aren't in a big hurry for the manger to dry.)


STEP 4:  Then press one of the sets of 4 popsicle sticks t:o the glued inside of the "X", making sure the glue has dried before releasing pressure.


STEP 5:  Stand the second  "X"  shaped popsicle sticks and glue one side of the inside top of the second "X" as you did in Step 3 for the first "X".  Then press the same set of 4 popsicle sticks to the glued inside of the second "X", making sure the glue has dried before releasing pressure.


STEP 6:  Then glue the remaining inside sides of the top of the "X's" and press the second set of 4 popsicle sticks to them.


Once the manger has dried you are ready for the good deeds to begin making sure the manger is filled by Christmas Day!


NOTE FOR PARENTS :-)  This works so much better than Santa's warning of being "Naughty or Nice"!
                                                 
                                                                     Enjoy
                                                                 ~ Debbie ~

Want more festive ideas?  Please click below...
Pineapples & Palm Trees

Tuesday, September 25, 2012

FESTIVE FRAMED MIRROR CENTERPIECE


I love to re-purpose items that I can find around the house for Christmas!  My most recent holiday creation starts with a 54" floor length wall mirror that I bought from WalMart a few years ago for my son's townhouse.  When he upgraded the wall with a new look, I reclaimed the mirror and instead of hanging it, I set it on my dining room table turning it into a large Christmassy centerpiece.  I centered candle holders with candles I already had in my closet near the middle, and then added packs of ornaments from Dollar Tree for an overall "blingy" look.  The best part is I can use the ornaments elsewhere when I'm not entertaining in the dining room, such as in large clear vases on my mantle (another inexpensive but classy holiday look).  
                                                 
                                                        MATERIALS NEEDED

                                                                  Mirror

                             Ornaments & Candle Holders & Candles (not pictured)

                                     Mix and match colors, shades and shapes!

Look around your house, you may have all of these items already just waiting to be incorporated into a gorgeous tablescape!  So if you are looking for a showy holiday centerpiece with big impact at little expense let your imagination run wild! 
  
                                    Every guest shares in its table length impact!

                                                   Festive holiday ambiance!                                                   

                                        ~ Allow your imagination to have fun ~
                                                               ~ Debbie ~


Want more decorating ideas?  Please click below...
Pineapples & Palm Trees                                                                                        

Thursday, September 6, 2012

FEARLESS - A GREAT GIFT IDEA FOR THOSE WHO LOVE HEROIC MILITARY STORIES


My husband was so moved by Adam Brown's heroic story that he talked at length about its encouraging message played out through Brown's life and death.  It is a posthumous biography,  well-written by Eric Blehm who chronicles Brown's life from his small town humble beginnings to the elite of the elite top tier of the U.S. military.  Unvarnished it is a portrait of a man strong enough to overcome personal defeats, and in turn, becoming an inspiration to us all.  Filled with tragedy and triumph,  this book is a compelling story of redemption, courage and sacrifice.  As many lives as Brown touched during his life, I believe he is touching even more in his death through this book.

You can buy this book at any local bookstore but I use Amazon for convenience.  If you are interested in purchasing from Amazon please click below...

Fearless: The Undaunted Courage and Ultimate Sacrifice of Navy SEAL Team SIX Operator Adam Brown

Want more gift ideas?  Please click below...
Pineapples & Palm Trees                                                                  Enjoy
                                                             ~ Debbie ~

Sunday, September 2, 2012

FESTIVE CHICKEN FAJITAS


My husband and I met while attending Virginia Tech.  Being poor college students at the time, most of our dates involved free admission venues and one of them happened to be VT football games.  We would jokingly complain we were always given student tickets in the nose-bleed section of the bleachers.  But, times have changed.   Tech football  is a powerhouse now and the seats we complained about back then sell for an unmentionable amount of money since the stadium today dwarfs itself from its once humble beginnings. 

So with the advent of big screen TV's and not wanting to pay the big $$$,  we have begun a tradition with other Virginia Tech friends of gathering together for the games in the comfort of our family rooms.  We have a great time playing armchair quarterbacks, rooting for our team and enjoying a great meal at halftime.    The recipe below is one of the favorites that I have made that is perfect for a holiday season casual get together.  It is a one-stop crowd pleaser - meat, vegetables and carbs all rolled into one festively colorful and deliciously tangy meal.   

                                                            INGREDIENTS
                                                                

                                   2 Roasted Chickens (Store roasted in deli section)
                                                    6 Peppers - 3 Red, 3 Green
                                                             6 Sweet Onions
                                  1/4 cup + 2 Tbsp. Light Sodium Worchester Sauce
                                        1/4 cup + 2 Tbsp. Light Sodium Soy Sauce
                                       1 tsp. McCormick Montreal Steak Seasoning
                                        *1 1/2 cups Vidalia Onion Vinagrette Dressing
                                                             1/4 cup Olive Oil
                                                                   Tortillias

Makes about 12 fajitas.  

*I used to buy Vidalia Onion Vinagrette Dressing in a twin-pak from Costco.  I have not been able to find it any longer at my local Costco.  If you cannot find it at yours, I have included an Amazon link that I purchase it from now.  Please click below...

Oak Hill Farms Vidalia Onion Vinaigrette Twin Pack, 33.8 Ounce Bottles   

DIRECTIONS:

STEP 1:  Slice up peppers & onions.  In pan, saute in olive oil until start to soften.  Then place in crock pot.


STEP 2:  Slice up white meat from roasted chickens and stir into peppers and onions mixture in crock pot.


STEP 3:  Stir in 1/4 cup + 2 Tbsp. (=3/8 cup) Worchester Sauce, 1/4 cup + 2 Tbsp. (=3/8 cup) Soy Sauce, 1 tsp. Montreal Steak Seasoning & 1 1/2 cups Vidalia Onion Vinagrette Dressing.


STEP: 4:  Pour mixture into crock pot, stir completely and cook for 3-4 hours. 

                                                                Enjoy
                                                            ~ Debbie ~

Want more recipe ideas?  Please click below...
Pineapples & Palm Trees