Friday, November 30, 2012

DRESS UP HOME FURNISHINGS AT CHRISTMAS


Incorporating Christmas decor within existing home furnishings adds an element of surprise to any room,  creating flair and interest to what is sometimes an otherwise hidden or overlooked space.  Placing glittery ornaments inside a sofa end table draws the eye to what is usually a humbly functional piece of furniture. 


Instead of using a tabletop to display festive ornaments, why not partially pull out one of its drawers and fill it to overflowing for a festive impact. 


Many homes have at least one decorator chest tucked into a corner of a room.  If you happen to have one of these popular accessories, open the lid and drape jeweled garland along its top and fill the bottom with colorful ornaments. 

There are so many unique and clever ways to dress up a room using its furnishings.  All you have to do to start is walk from room to room in your home with freshly opened eyes.  You'll surprise yourself with all you have to work with that is just waiting to be dressed up! 

                                                                   ~ Debbie ~

Want more decorating ideas?  Please click below...
Pineapples & Palm Trees

Tuesday, November 27, 2012

HOLIDAY DINING AL FRESCO


Having lived in Washington, D.C. most of my life, it has been only on rare occasions that I've seen a White Christmas.  Ever since I was a little girl, in my mind, cold weather was created strictly for snow - if it isn't snowing then we should be having tropical weather.  So having given up on a White Christmas, for as long as I can remember, I have longed to eat Christmas dinner outdoors all the while singing "Mele Kalikimaka".  But, since global warming has not warmed up my Christmas enough to eat outside, for those of you who live in warm, sunny climates this blog's for you!

In addition to festive tableware, dress up your patio table with greenery, lanterns and an old English tradition of Christmas crackers.

An evergreen wreath decorated with pine cones and berries creates a beautiful centerpiece and sitting prettily in its center a lantern that burns brightly into the night.

Additional lighting can be created with individual mini lanterns to light up each guest's place setting.  Mini lanterns can be found at Michael's in the bridal aisle. 

Christmas crackers are an old English tradition that originated in the mid 1800's.  Although they can be purchased in stores such as Home Goods, they can be personalized by making them yourself.   If you would like to learn more about this DIY project, please click link below...

HOW TO MAKE CHRISTMAS CRACKERS

To add flair to your outdoor dining experience, dress up chair backs with teardrop garland, pine cones & bows.  If you would like to create your own teardrop garland or bows, please click below...

HOW TO MAKE TEARDROP GARLAND

HOW TO MAKE A BOW

I hope you think of me as you entertain this season outdoors.  Although I won't be eating outside on Christmas Day, my dream has been realized close enough by way of an invite to Hilton Head, SC.  Wonderful friends of ours invited us last year to their beach house the day after Christmas.   On New Year's Eve we found ourselves grilling outdoors, sitting around their patio table reminiscing.   Decked out in New Year's hats and necklaces, at the end of the evening our friends said, "Why don't we just put these away in the owner's closet until next year."  Those words were music to our ears - we're getting invited back!!!


Want more entertaining ideas?  Please click below...
Pineapples & Palm Trees                                                                      
                                                                 ~ Debbie ~

Monday, November 19, 2012

CHRISTMAS POPPERS


Christmas poppers originated in England in the mid 1800's and is still an integral part of the Christmas celebration there today.  Although it is not as popular a tradition in the U.S., it surely is in my sister's home.  For them,  Christmas dinner starts off with a bang (literally!) as these fun little creations often have snap crackers in them to create a pop gun type noise.

Traditionally each person at the table crosses their arms and instead of holding hands with the person on either side of them, they each hold one end of the popper.  On the count of three everyone pulls the cracker toward themselves, similarly to pulling a wishbone, ripping them open. Candy, trinkets, jokes and a crown fit for a king comes spilling out. 

Being that I love a good DIY project, I decided to make these this year for my own Christmas dinner, personalizing them for each member of my family.  It's fun activities like this that create memories and traditions for generations to come.  Hope you enjoy!!


                                                              MATERIALS


                                                      *Wrapping/Tissue Paper
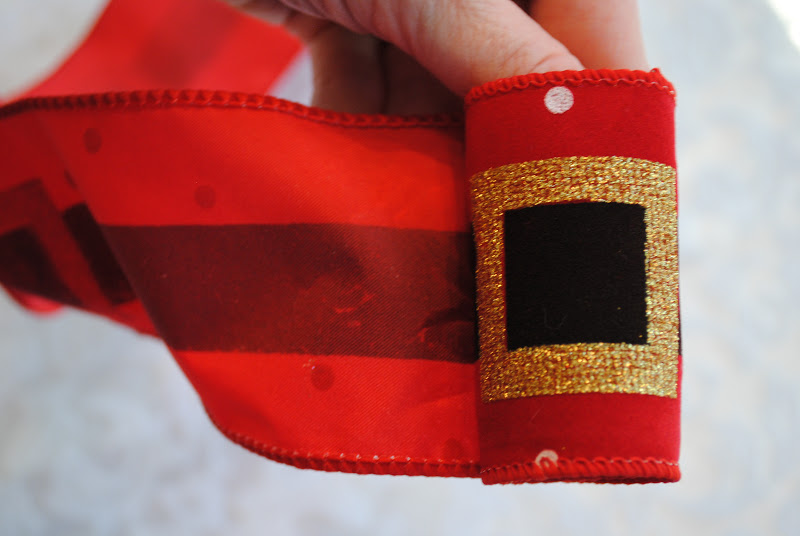
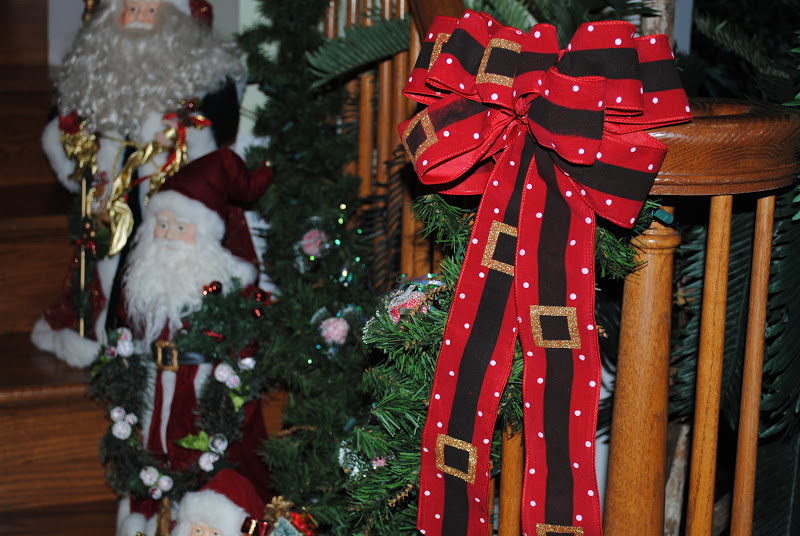
                                                                   Ribbon
                                                            Cardboard Tube
                                                         Tape (Double sided)
                                                        Ruler/Measuring Tape
                                                              Pencil/Marker
                                                                  Scissors
                                                          **Popper/Snapper
                                               **Candy (Individually wrapped)
                                    **Toys/Trinkets (Miniature in size to fit in tube)
                                         **Computer Paper (1) (For riddles/jokes)

*Tissue or wrapping paper can be used to make the crown that is inserted inside the cracker.  Wrapping paper is for wrapping the outside of the popper.  I used two different wrapping papers to make my cracker - one for the crown, the other for wrapping the popper.

**These items are what traditionally fill the inside of the tube.  But, since you are making them, you can decide what you would like to include so please consider these items optional suggestions.

                                                          INSTRUCTIONS

STEP 1:  Cut cardboard tube into 3 pieces (1 piece- 4 1/2" long, 2 pieces - 2 1/2" long).
I used a cardboard tube from wrapping paper because it was sturdier than a paper towel cardboard tube.  

I could not find a popper/snapper locally so have not included a how-to photo for it.  It isn't necessary to include a popper/snapper since it is for noise value only (pop gun sound) and may actually not be an asset in a household with a sleeping baby or pet with hearing sensitivity.  But, if you do decide to include it, this would be the step where you would attach it to the inside of the 4 1/2 inch tube with tape.  I've included a link so you can see a picture of a popper.  I have never purchased anything from this company so I have no firsthand experience with them as a customer.  But, they are one of the few places you can buy poppers in America.  Please click below if you would like to read more about poppers...

Popper for Christmas Cracker 

 
Cracker Snaps
                                    Popper - Courtesy of OldeEnglishCracker.com

To include a popper in your Christmas popper you would insert it into the 4 1/2" tube.  Both ends of the popper/snapper should extend equally beyond both ends of the  4 1/2" tube.  Once it is extending out of the tube equally, secure the popper on the inside of the tube with tape.  Place the 2 1/2" tubes on either end of the 4 1/2" tube (inserting the popper/snapper in each 2 1/2" tube but not attaching the popper/snapper to the tubes). The 2 1/2" tubes are used to keep the Christmas popper formed correctly.  Once the popper is completed the 2 1/2" tubes are removed and the extended portion of the popper will be hidden by pretty wrapping paper.


STEP 2:  To wrap tube cut a piece of wrapping paper 8"x13".  Place the tubes on the underneath  side of the wrapping paper leaving a slight separation between each tube.  Roll wrapping paper around tubes.


STEP 3:  Secure wrapping paper on the underneath side of the wrapping paper with double sided tape so that tape is not showing on the outside of the wrapping paper.


STEP 4:  Gently pull one of the 2 1/2" tubes to the edge of the wrapping paper.


STEP 5:  After you have moved the one 2 1/2" tube to the edge, scrunch the wrapping paper as closely as possible to the 4 1/2" tube.


STEP 6:  Tie the scrunched paper with ribbon.  Completely remove the 2 1/2" cardboard tube as it is no longer needed.  It can be reused so save it if you are making more.


You are now ready to fill the tube with whatever fun things your family and friends enjoy!
They are traditionally filled with candy, toys/trinkets, riddles/jokes, a gold crown and a popper/snapper (makes a loud noise).   But, you pick and choose. 

                                                                  CANDY

                                                         Individually wrapped

                                                          TOYS/TRINKETS

                        Being homemade (vs. store bought) you can customize treats.

                                                            JOKES/RIDDLES 

       Print or write jokes/riddles. I found these on the internet - google Christmas Jokes.  
                                                                   
                                                                 CROWN


 Cut a strip of wrapping or tissue paper 4"x24".  Cut V-shaped notches the length of one side of the paper. Fold until it is small enough to fit into tube.
                                             
STEP 7:  Fill the open end of the tube with your choice of goodies.


STEP 8:  Repeat Steps 4-6 for other side of cracker, gently pulling out 2 1/2" tube to edge of wrapping paper, scrunching wrapping paper closely to 4 1/2" tube, securing with ribbon and then removing 2 1/2" tube.


                                                              ~ Debbie ~

Want more festive ideas?  Please click below...
Pineapples & Palm Trees

Wednesday, November 14, 2012

TEARDROP GARLAND


Teardrop garland  is "V" shaped and can be used as wreaths as well as for other holiday decor.  The best part is it can be embellished to fit any decorating style in just a few easy steps.  One of my favorite things to do with it is to dress up the back of chairs at Christmas.


Teardrop garland comes in as many sizes as there are creative ways to use it.  Michaels sells a variety of lengths.  The length of the garland pictured above is 14" not including the stem.  

                                                             MATERIALS 


                                                         Teardrop Garland
                                                             Bow/*Ribbon
                                                            **Pine Cones
                                                                 Scissors
                                                              Floral Wire

*If you are not buying a ready made bow and need instructions on making a bow please click below...

How To Make A Bow

**I used pine cones for ornamentation but Christmas ornaments work well also.

INSTRUCTIONS:

STEP 1:  Attach the wire on the back side of the bow to the top of the teardrop garland.  The stem on the garland pictured came shaped into a hanger for easy hanging.  Some teardrop garland has a straight stem.  Either stem shape will work.


STEP 2:  Attach wire to base of pine cones.  If base doesn't have a stem, attach wire around bottom scales of pine cone.
  

 STEP 3:  Attach pine cones by their wires to a sprig/sprigs of garland underneath bow.


STEP 4:  To attach teardrop garland to chair, bend stem into a loop like the top of a hanger.


 To protect your chair from scratches, wrap ribbon around the hanger part of the stem .


Hang the hanger part of the stem over the back of the chair top.

                                                               
                                                                ~ Debbie ~

Want more decorating ideas?  Please click below...
Pineapples & Palm Trees

Thursday, November 8, 2012

HOW TO MAKE A BOW


Bows add fun and festivity to everything.  You can attach them to wreaths, garland, chair backs, sconces as well as endless other possibilities.  They are easy and inexpensive to makeThe instructions below look long and laborious but there really are just a few steps that are repeated over and over again to create a beautiful full bow!

                                                               MATERIALS

                                                            *5 yards Ribbon
                                                                Floral Wire 
                                                                   Scissors
                                                             Tape Measure


*Fabric and craft stores sell a large variety of ribbon.  Costco sells a nice selection at Christmas as well.  If you like convenience, Amazon also has a great selection.  Please click below if you would like to see what they offer...

Christmas Ribbon

                                                             INSTRUCTIONS

STEP 1:   Roll one end of the ribbon around your thumb.  The roll will be about 1 1/2" round.  You will continue to hold the roll securely in place with your thumb as you make your bow.  This roll will be the center of your bow... 


Position ribbon to look like photo below.  This will be the front of the bow...


Photo below is the back of the bow...


STEP 2:  With the front of the bow facing you, twist ribbon in back of the center roll...


The back of the bow will now look like photo below...


The front of the bow will now look like this...


Loop ribbon (2 1/4") to the left side of the center roll which you are holding securely with your thumb so that it looks like photo below...


With the front of the bow facing you twist ribbon in back of the bow...


The back of the bow will now look like this... 


The front of the bow will now look like this...


Loop ribbon (2 1/4") on right side of the center roll you are still holding securely with your thumb so that it looks like photo below...


STEP 3:  With the front of the bow facing you, twist ribbon in back of the center roll...


The back of the bow will now look like photo below...


The front of the bow will now look like this...


Loop ribbon (1 1/4" longer than first loop) to the left side of the center roll which you are holding securely with your thumb so that it looks like photo below...


With the front of the bow facing you twist ribbon in back of the center roll...


The back of the bow will now look like photo below...


 The front of the bow will now look like this...


Loop ribbon (1 1/4" longer than first loop) on right side of the center roll you are still holding securely with your thumb so that it looks like photo below...


You have now made two loops on each side of the center roll.  A large full bow requires five loops on each side.  Repeat the steps above until you have made five on each side.


Once you have made five loops on each side bring excess ribbon straight down vertically from behind center roll.  Cut vertical ribbon to desired length...


Cut a second piece of ribbon about the same length as the vertical ribbon in the photo above and set aside for now...


STEP 4:  Cut and thread floral wire (12-18" depending on width of ribbon) through the center roll...


Pull the floral wire to the back of the bow and twist tightly behind the center roll so that the loops of ribbon are pulled tautly together to secure them in place...


STEP 5:  Taking the second piece of ribbon you cut to hang vertically, place it behind the center roll on top of existing twisted wire and secure the second ribbon in place tightly to secure... 


Front of the bow will now look like photo below...


STEP 6:   To fluff out the bow loops - start on left side of the center roll - With you left hand grab the first loop nearest the center roll and with your right hand grab the second loop.  With your left hand pull the first loop upward and with your right hand pull the second loop downward simultaneously... 


Do the same with the third and fourth loops.  With your left hand grab the third loop and with your right hand grab the fourth loop.  With your left hand pull the third loop upward and with your right hand pull the fourth loop downward simultaneously...  


Then holding the four loops in place with your left hand take the fifth loop with your right hand and pull downward..


Repeat the same process on right side of the bow...


                                          YAY!!!  You have completed your bow!!! 


                                                                ~ Debbie ~
                                                                 
Want more decorating ideas?  Please click below...
Pineapples & Palm Trees