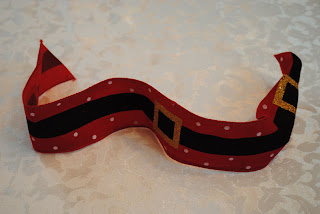
Bows add fun and festivity to everything. You can attach them to wreaths, garland, chair backs, sconces as well as endless other possibilities. They are easy and inexpensive to make. The instructions below look long and laborious but there really are just a few steps that are repeated over and over again to create a beautiful full bow!
MATERIALS
*5 yards Ribbon
Floral Wire
Scissors
Tape Measure
*Fabric and craft stores sell a large variety of ribbon. Costco sells a nice selection at Christmas as well. If you like convenience, Amazon also has a great selection. Please click below if you would like to see what they offer...
Christmas Ribbon
INSTRUCTIONS
STEP 1: Roll one end of the ribbon around your thumb. The roll will be about 1 1/2" round. You will continue to hold the roll securely in place with your thumb as you make your bow. This roll will be the center of your bow...
Position ribbon to look like photo below. This will be the front of the bow...
Photo below is the back of the bow...
STEP 2: With the front of the bow facing you, twist ribbon in back of the center roll...
The back of the bow will now look like photo below...
The front of the bow will now look like this...
Loop ribbon (2 1/4") to the left side of the center roll which you are holding securely with your thumb so that it looks like photo below...
The front of the bow will now look like this...
Loop ribbon (2 1/4") on right side of the center roll you are still holding securely with your thumb so that it looks like photo below...
STEP 3: With the front of the bow facing you, twist ribbon in back of the center roll...
The front of the bow will now look like this...
Loop ribbon (1 1/4" longer than first loop) to the left side of the center roll which you are holding securely with your thumb so that it looks like photo below...
With the front of the bow facing you twist ribbon in back of the center roll...
The back of the bow will now look like photo below...
The front of the bow will now look like this...
Loop ribbon (1 1/4" longer than first loop) on right side of the center roll you are still holding securely with your thumb so that it looks like photo below...
You have now made two loops on each side of the center roll. A large full bow requires five loops on each side. Repeat the steps above until you have made five on each side.
Cut a second piece of ribbon about the same length as the vertical ribbon in the photo above and set aside for now...
STEP 4: Cut and thread floral wire (12-18" depending on width of ribbon) through the center roll...
Pull the floral wire to the back of the bow and twist tightly behind the center roll so that the loops of ribbon are pulled tautly together to secure them in place...
STEP 5: Taking the second piece of ribbon you cut to hang vertically, place it behind the center roll on top of existing twisted wire and secure the second ribbon in place tightly to secure...
Front of the bow will now look like photo below...
STEP 6: To fluff out the bow loops - start on left side of the center roll - With you left hand grab the first loop nearest the center roll and with your right hand grab the second loop. With your left hand pull the first loop upward and with your right hand pull the second loop downward simultaneously...
Do the same with the third and fourth loops. With your left hand grab the third loop and with your right hand grab the fourth loop. With your left hand pull the third loop upward and with your right hand pull the fourth loop downward simultaneously...
Then holding the four loops in place with your left hand take the fifth loop with your right hand and pull downward..
Repeat the same process on right side of the bow...
YAY!!! You have completed your bow!!!
~ Debbie ~
Pineapples & Palm Trees


No comments:
Post a Comment